
When we moved into our Utah fixer upper, we had fourteen windows and zero plan. We thought choosing curtains would be easy. Pick a color. Hang a rod. Done. Then we discovered fabric types, light levels, pleats, rails, blackout lining, and enough jargon to make our heads spin.
Now that we have tested almost everything across our home, here is the simple guide we wish we had from day one.
Start With One Question: How Much Light Do You Want?
Before you get into fabrics and hardware, decide what each room actually needs. Bedrooms, living rooms, nurseries, offices, kitchens, all have different light requirements.
Here is how we approached it.
- Bedrooms: total darkness for better sleep
- Living room: soft light but no glare
- Emma’s room: nap friendly without feeling like a cave
- Office: privacy during video calls, daylight during work
- Kitchen: maximum natural light
Once you know the light goal, the fabric choice becomes much easier.
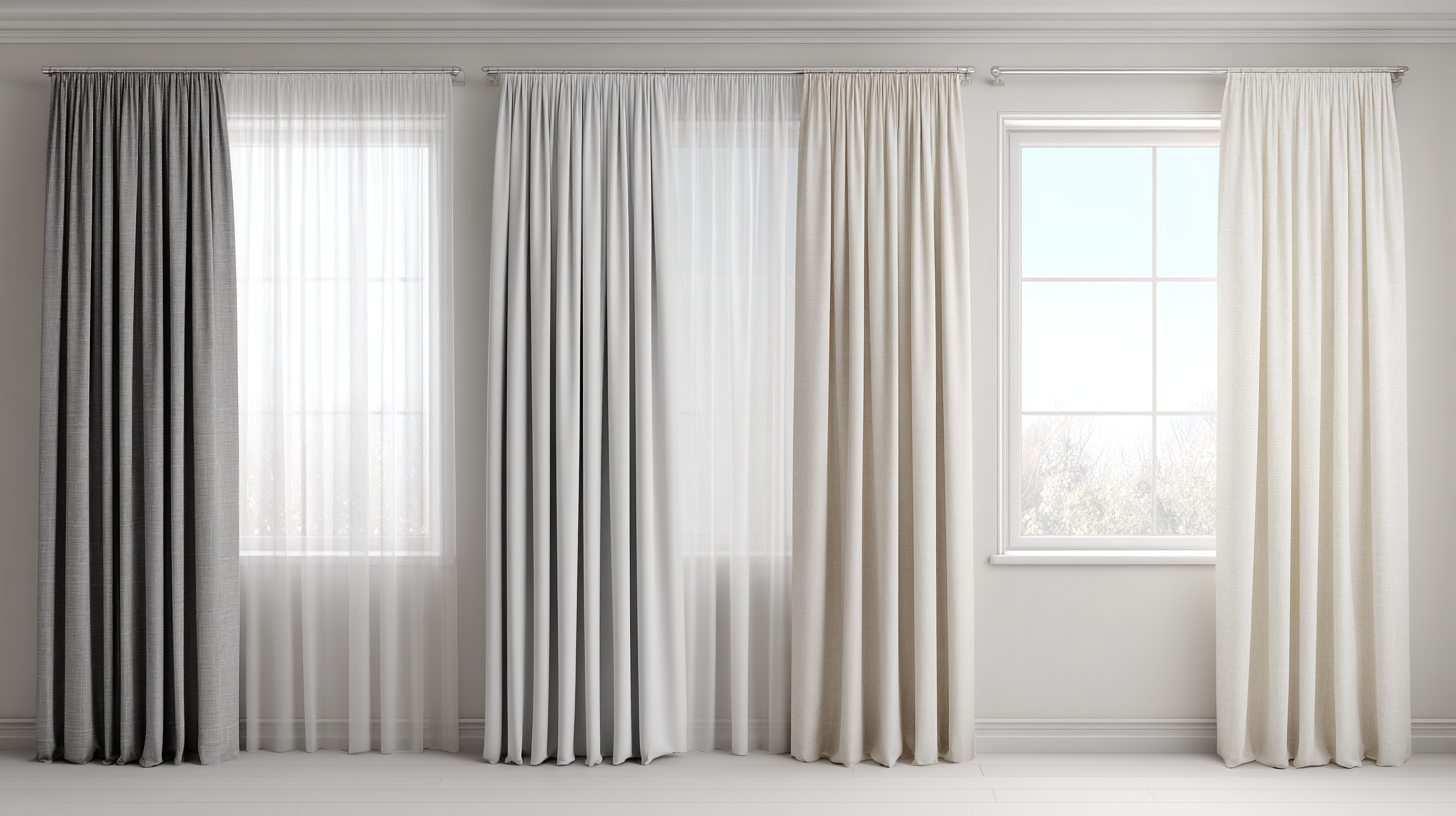
Option 1: Blackout Curtains
If you like sleeping in or you have a toddler who needs predictable naps, blackout curtains are your best friend.
Best for
Bedrooms, nurseries, media rooms, offices that face direct sunlight.
Pros
- Blocks 90 to 100 percent of light
- Provides insulation for heat and cold
- Improves sleep quality
- Adds privacy even at night
Cons
- Can look heavy if not styled well
- More expensive
- Requires proper measurement to prevent light gaps
We added blackout curtains to every bedroom. Emma sleeps better. We sleep better. Copper sleeps like he’s getting paid to demonstrate comfort.
Option 2: Pleated Curtains
Pleated curtains feel structured, clean, and more intentional. They give a room shape the moment you hang them.
Best for
Living rooms, dining rooms, offices, homes with a more tailored style.
Pros
- Looks custom
- Hangs beautifully and stays in place
- Works well with motorized tracks
- Can be blackout, room darkening, or light filtering
Cons
- Slightly pricier than standard panels
- Needs accurate measurement to look right
Pleats helped hide imperfections during renovation. They made half finished rooms look pulled together long before they truly were.
Option 3: Standard Curtains
These are the simplest and most budget friendly option. No fancy folds. No special hardware. Just straight panels you slide onto a rod.
Best for
Guest rooms, secondary spaces, kitchens, or anywhere you do not need full light control.
Pros
- Affordable
- Easy to hang
- Easy to replace
- Comes in a huge variety of styles
Cons
- Less structure
- Does not block light well
- Can look flat if the fabric is too thin
We used standard panels in spaces where we needed function but not perfection, like the guest room and laundry hallway.
So Which One Should You Choose?
Here is the formula we use now that we have lived through the mistakes.
- If sleep matters: blackout
- If you want a clean, intentional look: pleated
- If the room is low priority: standard
- If you plan to motorize: pleated or blackout on a track
Standard curtains can work with motorization, but pleated and blackout panels glide more smoothly.
Bonus Tip: Layers Make a Huge Difference
One trick that changed our entire house is layering fabrics. It gives you flexibility, better light control, and a more polished, designer feel without designer pricing.
Where We Used Layers in Our Home
1. Primary Bedroom: Sheer + Blackout Combo
We installed a sheer panel behind the blackout curtain. During the day we keep the blackout open and let the sheers diffuse the light. At night the blackout takes over. It feels airy without sacrificing darkness.
2. Emma’s Room: Blackout Roller Shade + Light Filtering Curtain
Emma’s naps are sacred. We layered a blackout roller shade inside the frame and added a soft, pastel curtain outside. The curtain keeps the room cute and cozy while the shade handles the heavy lifting.
3. Living Room: Sheers Behind Pleated Curtains
The living room needed privacy without shutting out sunlight. We hung sheers for daytime use and added pleated curtains for the early evenings when the sun hits directly. It also hides the construction view from the backyard on renovation days.
4. Office: Light Filtering Shade + Pleated Curtain
For video calls, we need even lighting. A light filtering roller shade prevents glare, and a single pleated panel makes the room look finished behind us.
Layer Combinations That Work Well
- Blackout roller shade behind pleated curtains
- Sheer curtains behind blackout drapes
- Light filtering shades plus decorative side panels
- Sheers plus motorized tracks for elegance and convenience
Layers give you the ability to control light without constantly opening and closing your curtains.
What We Learned After Fourteen Windows
- The fabric matters more than the hardware
Cheap blackout still beats expensive thin fabric in a bedroom. - Pleats elevate everything
Even budget curtains look high end with a structured pleat. - Measure twice, order once
We learned this the hard way. - Blackout always pays off in bedrooms
Worth it every time.
Standard panels shine in low priority spaces
They stretch your budget without sacrificing comfort.
.png)
.png)